raylib and shadows
its more likely than you think
Preamble.
This is kind of a test as my first post, I can come back to this another time with an example and screenshots etc.
For now I just want to cover the basics of shadowmapping as they apply to raylib. This example on Ray’s github may guide you along as well, once you understand the steps. From there I might go into soft shadows, volume shadows, and shadow cascades and everything else I did to make shadows look decent and fast in Group Z.
Xor shadowmaps, Oakleaff volume shadows
raylib and shadows.
raylib (lowercase r) does not have an integrated solution for shadows like a standard, off the shelf 3D game engine. For a lot of new users, I think this can be a roadblock or a turn off, especially for those sold on raylib as something that it’s not. raylib is a library for game programming- the nature of that includes modules for math, audio, resource handling and very very very basic graphics. While this means you are limited in what you can accomplish off the mark, you are also unlimited in what you can learn, and you can learn very quickly. Using raylib is only a half-step away from making an OpenGL game engine from scratch. I’d argue it’s better than jumping straight in to GLFW, getting oneshot by an overload of information on learnopengl.com, and dropping the project right after hello triangle.
Ahem.
Shadows, shrimply.
Adding shadows to raylib requires some understanding of how shadows work in 3D graphics. Almost anywhere you read about this, you will read ‘render the scene from the perspective of the light’ and kind of get lost in the rest. At least, that’s what happened to me. Skill issue?
Realistically, however, there are two parts: creating a shadowmap (CPU setup, rendering from the perspective of the light), and sampling a shadowmap (GPU setup, occlusion testing).
Creating a shadowmap:
Create a render target / framebuffer / texture / surface for the shadowmap
Set your camera to the position of the light source
Render the scene. The final depth buffer represents the shadow casting (occluding) objects
Sampling a shadowmap:
Transform the fragment position from world space into the view space of the light, including depth
Test depth against the depth buffer of the shadowmap texture
Change the fragment colour if the fragment has greater depth (is further from the light) than the shadowmap sample
Cameras.
In 3D graphics, there is no such thing as a ‘camera’. What you get are model (or world), view and projection matrices, which are 4x4 transformation matrices that perform translation, rotation and scaling.
The model matrix will place the model in the world, rotating and scaling the mesh about its local origin (within the model) and placing it in the scene (translation).
The view matrix is effectively the camera, which- after placing the model in the world with the model matrix- will transform the entire scene about the camera.
The projection matrix will determine the view frustum, or what is visible on screen. A perspective projection matrix will also apply perspective distortion, making distant objects converge according to the FOV. Anything outside of the NDC space (-1..1 for x,y on the screen, where 0,0 is the center) after this transformation is discarded.
Framebuffers.
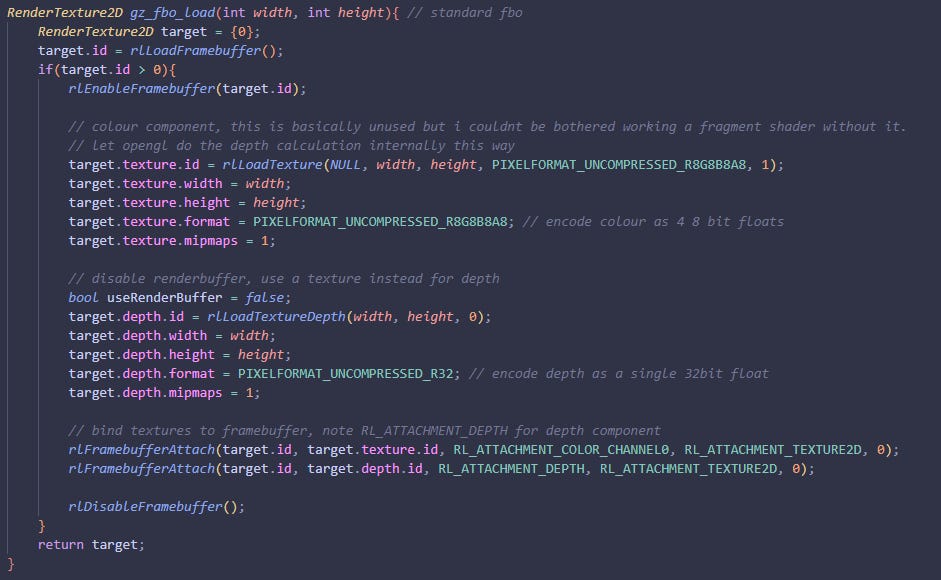
The biggest part of a shadowmap is the texture itself. You will be using the depth component of a RenderTexture2D in raylib, but by default the RenderTexture2D you get from LoadRenderTexture has a depth buffer that is not recognized as a texture by OpenGL, and cannot be sampled in a shader like one. For this you will have to write your own version of LoadRenderTexture, using a texture as a depth buffer. You can also write to the colour buffer using texture formats and encoding depth values, or use no colour buffer at all, but OpenGL writes the depth for us already when we output a colour fragment, so we may as well use it.
The function can be set up like this:
RenderTexture2D gz_fbo_load(int width, int height){ // standard fbo
    RenderTexture2D target = {0};
    target.id = rlLoadFramebuffer();
    if(target.id > 0){
        rlEnableFramebuffer(target.id);

        // colour component, this is basically unused but i couldnt be bothered working a fragment shader without it.
        // let opengl do the depth calculation internally this way
        target.texture.id = rlLoadTexture(NULL, width, height, PIXELFORMAT_UNCOMPRESSED_R8G8B8A8, 1);
        target.texture.width = width;
        target.texture.height = height;
        target.texture.format = PIXELFORMAT_UNCOMPRESSED_R8G8B8A8; // encode colour as 4 8 bit floats
        target.texture.mipmaps = 1;

        // disable renderbuffer, use a texture instead for depth
        bool useRenderBuffer = false;
        target.depth.id = rlLoadTextureDepth(width, height, 0);
        target.depth.width = width;
        target.depth.height = height;
        target.depth.format = PIXELFORMAT_UNCOMPRESSED_R32; // encode depth as a single 32bit float
        target.depth.mipmaps = 1;

        // bind textures to framebuffer, note RL_ATTACHMENT_DEPTH for depth component
        rlFramebufferAttach(target.id, target.texture.id, RL_ATTACHMENT_COLOR_CHANNEL0, RL_ATTACHMENT_TEXTURE2D, 0);
        rlFramebufferAttach(target.id, target.depth.id, RL_ATTACHMENT_DEPTH, RL_ATTACHMENT_TEXTURE2D, 0);

        rlDisableFramebuffer();
    }
    return target;
}
RLGL is where raylib shines, in my opinion. You get the tools to do basic graphics with raylib core, and from there the RLGL functions integrate quite nicely for different behaviour. RLGL and OpenGL are almost analogue, so the more you use it the more you will understand what OpenGL is doing.
Creating a shadowmap.
For shadows, you will want a view matrix that points from the direction of the light to the position of the player, with orthographic projection corresponding to the size of your shadowmap texture. raylib makes this easy by giving you functions to create these matrices from simple position vectors. The necessary Camera structs can be set up like this, when you initialize the scene:
// init
    Camera camera_main = {0}; // ...main camera
    camera_main.position = (Vector3){0,0,0}; // position of the camera
    camera_main.target = Vector3Add(camera_main.position,(Vector3){1,1,1}); // usually a direction vector
    camera_main.fovy = 80;
    camera_main.up = (Vector3){0,1,0};
    camera_main.projection = CAMERA_PERSPECTIVE;

    Camera camera_light = {0}; // ...light camera
    camera_light.target = camera_main.position;
    camera_light.position = Vector3Add(camera_main.position,(Vector3){400,400,400}); // world space offset of camera
    camera_light.up = (Vector3){0,1,0};
    camera_light.projection = CAMERA_ORTHOGRAPHIC;
You will also want to update the position and target of camera_light each frame so that it follows the player around, and the areas that cast shadows are localized around the camera. Not doing this will mean you are either a. rendering the entire scene at very low resolution on the shadowmap (ugly) or b. you have an impossibly large shadowmap (impossible). Additionally you can calculate central points within the view frustum so more visible space is shadowed, which is also useful for cascades.
camera_light uses orthographic projection because it is assumed that the ‘sun’ is far enough away that perspective is irrelevant. For other lights like point lights and spotlights, you can use a perspective projection where the FOV corresponds to the FOV of the light.
In raylib, the function BeginMode3D(Camera) will turn some basic parameters from the Camera struct into your view and projection matrices, and feed them to OpenGL in a way that it understands. For this orthographic projection, you may want to modify the projection matrix in some way, as by default raylib will set the projection matrix to fit 1:1 with the target texture. This becomes more relevant when attempting cascading shadow maps (i may cover this another time).
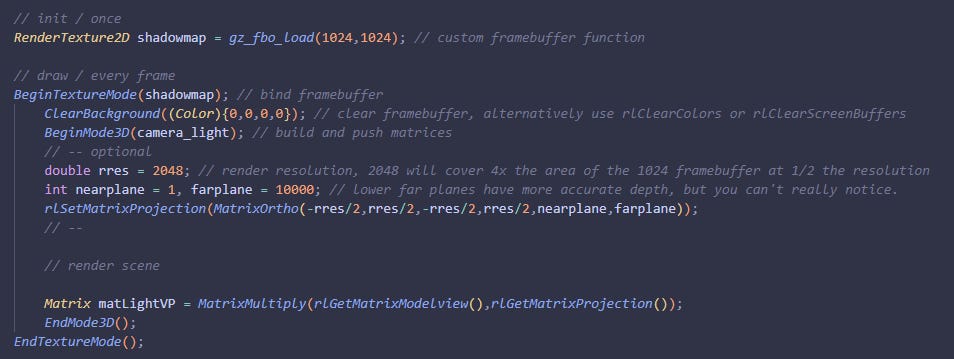
Using the above RenderTexture2D function (gz_fbo_load in my case), we can create the framebuffer for our shadowmap and set its resolution:
// init / once
    RenderTexture2D shadowmap = gz_fbo_load(1024,1024); // custom framebuffer function

    // draw / every frame
    BeginTextureMode(shadowmap); // bind framebuffer
        ClearBackground((Color){0,0,0,0}); // clear framebuffer, alternatively use rlClearColors or rlClearScreenBuffers
        BeginMode3D(camera_light); // build and push matrices
        // -- optional
        double rres = 2048; // render resolution, 2048 will cover 4x the area of the 1024 framebuffer at 1/2 the resolution
        int nearplane = 1, farplane = 10000; // lower far planes have more accurate depth, but you can't really notice.
        rlSetMatrixProjection(MatrixOrtho(-rres/2,rres/2,-rres/2,rres/2,nearplane,farplane));
        // --

        // render scene

        Matrix matLightVP = MatrixMultiply(rlGetMatrixModelview(),rlGetMatrixProjection());
        EndMode3D();
    EndTextureMode();
Of course, ‘render scene’ meaning draw everything. Ideally you’ll have a separate function that does this, though you will also have to consider your materials and shaders. You can use some empty material, which uses the default shader and no textures, or you can write separate forward and shadow shaders for each material. Right now the shader you use for the shadow pass doesn’t matter that much, since we are only changing the depth attachment format and nothing else. In Group Z I use separate shaders, as I need need different fragment shaders for deferred rendering in my forward pass, and special behaviour in shadows. It’s something to consider but not all too hard to refactor later.
You will also notice we use RLGL to record the combined view and projection matrices for this camera into ‘matLightVP’. Since the matrices only exist after calling BeginMode3D, you need to pull the matrices while they are immediately current.
You can also do some CPU culling based on what definitely is or is not visible to the light camera. For Group Z, the terrain is divided into chunks, so during my shadow pass I only have to draw the closest 1-4 chunks for my nearest shadowmap. This can save a lot of time in scenes with high vertex counts.
Sampling a shadowmap.
The hard part, but not really. In raylib you will need some pipeline for custom shaders, whether you use raylib’s integrated material struct or roll your own is up to you, but there are some fun gotchas with raylib that can make shaders more difficult or annoying if you don’t want to roll all your draw code from scratch.
raylib, when loading a shader into its Shader struct, will check for keywords in the shader when assigning default _LOC (location) values. Most notably for this case are ‘matModel’ and ‘mvp’, which are the model matrix and model * view * projection matrices respectively. You can look into LoadShader() on github to see what the keywords are, as it makes integrating them with functions like DrawMesh and other raylib functions much easier.
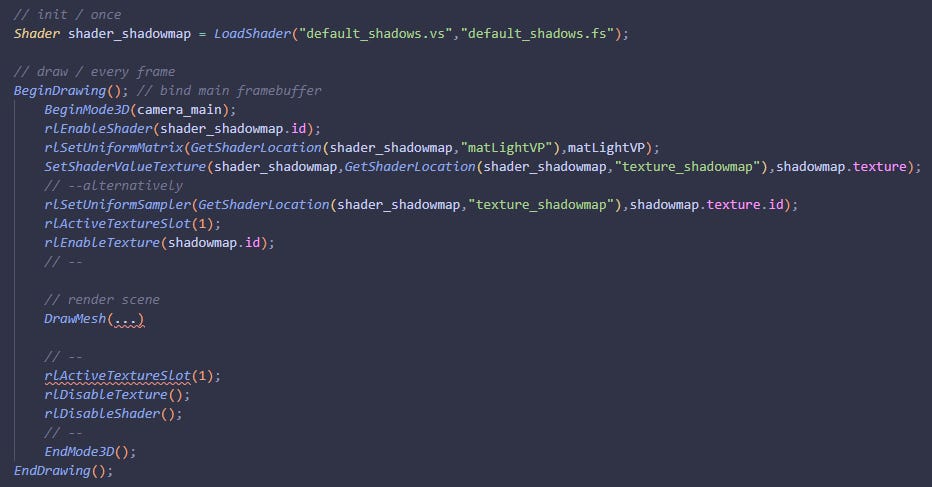
Sampling a shadowmap will require writing your own shader, where you will be passing the view/projection matrix we recorded earlier. We will need to create a shader, and enable it before rendering our main scene. Additionally we will need to pass the light view/projection matrices to the shader, as well as the texture of the shadowmap depth buffer. On the CPU side, the setup looks like this:
// init / once
    Shader shader_shadowmap = LoadShader("default_shadows.vs","default_shadows.fs");

    // draw / every frame
    BeginDrawing(); // bind main framebuffer
        BeginMode3D(camera_main);
        rlEnableShader(shader_shadowmap.id);
        rlSetUniformMatrix(GetShaderLocation(shader_shadowmap,"matLightVP"),matLightVP);
        SetShaderValueTexture(shader_shadowmap,GetShaderLocation(shader_shadowmap,"texture_shadowmap"),shadowmap.texture);
        // --alternatively
        rlSetUniformSampler(GetShaderLocation(shader_shadowmap,"texture_shadowmap"),shadowmap.texture.id);
        rlActiveTextureSlot(1);
        rlEnableTexture(shadowmap.id);
        // --

        // render scene
        //DrawMesh(...)

        // --
        rlActiveTextureSlot(1);
        rlDisableTexture();
        rlDisableShader();
        // --
        EndMode3D();
    EndDrawing();
I use the RLGL functions for shader uniforms because DrawMesh does as well, and the uniforms carry over if the locations in the shader are the same. If you only have one shader for drawing, they definitely will be the same, otherwise you will have to repeat the uniform passing step for each shader you have as the locations will be different.
For texture binding, DrawMesh will try to bind some textures on its own depending on what is available in the materials. If you use rlSetUniformSampler and the texture isn’t being passed at all, you can try changing the active texture, or using SetShaderValueTexture. I’m not 100% on the best approach because I don’t use materials or DrawMesh, but this should give you a general idea.
Shaders.
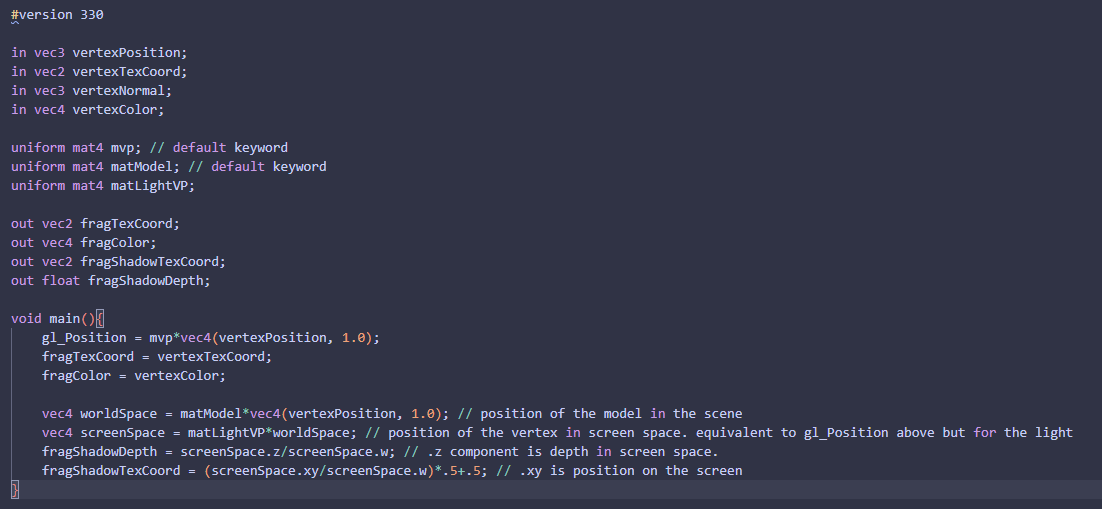
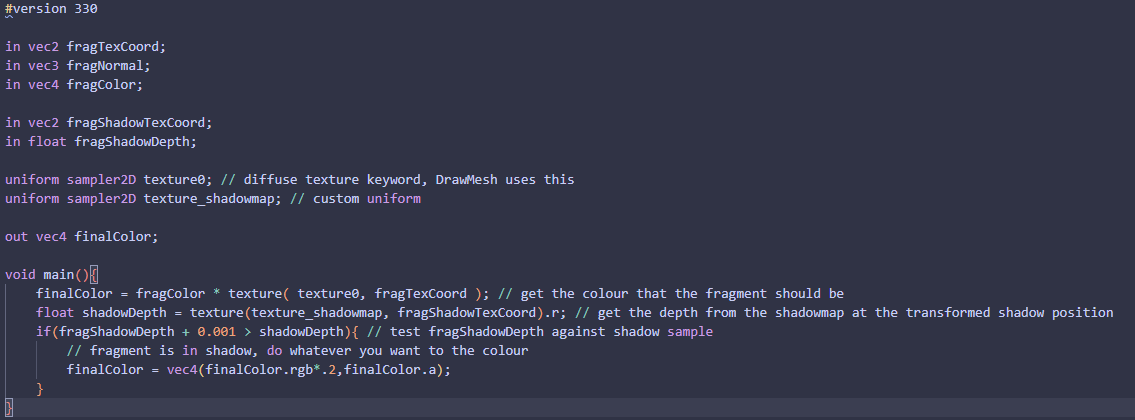
For shadowmapping, we need to transform the world space coordinates (position in the scene) to the clip space (position on the texture) of the light source within the vertex shader, which lets the fragment shader know where this fragment would be if it were projected by the light source. This is the meat of shadows that links ‘render the scene from the lights perspective’ to getting actual shadows.
#version 330

in vec3 vertexPosition;
in vec2 vertexTexCoord;
in vec3 vertexNormal;
in vec4 vertexColor;

uniform mat4 mvp; // default keyword
uniform mat4 matModel; // default keyword
uniform mat4 matLightVP;

out vec2 fragTexCoord;
out vec4 fragColor;
out vec2 fragShadowTexCoord;
out float fragShadowDepth;

void main(){
    gl_Position = mvp*vec4(vertexPosition, 1.0);
    fragTexCoord = vertexTexCoord;
    fragColor = vertexColor;

    vec4 worldSpace = matModel*vec4(vertexPosition, 1.0); // position of the model in the scene
    vec4 screenSpace = matLightVP*worldSpace; // position of the vertex in screen space. equivalent to gl_Position above but for the light
    fragShadowDepth = screenSpace.z/screenSpace.w; // .z component is depth in screen space.
    fragShadowTexCoord = (screenSpace.xy/screenSpace.w)*.5+.5; // .xy is position on the screen
}
This is the vertex shader for basic shadowmapping. The goal for this is to calculate where this vertex would be on the shadowmap, including depth. the division by screenSpace.w is perspective divide, which would be relevant for light sources that use perspective projection, but our setup is orthographic so realistically you don’t need it. The *.5+.5 is to convert the coordinates that the projection matrix spits out into usable texture coordinates for the fragment shader. Projection matrices output in a range of -1..1, and textures are sampled in a range of 0..1, so this conversion is necessary. Note the two ‘out’ variables fragShadowTexcoord and fragShadowDepth, which are our positions we will use for sampling.
#version 330

in vec2 fragTexCoord;
in vec3 fragNormal;
in vec4 fragColor;

in vec2 fragShadowTexCoord;
in float fragShadowDepth;

uniform sampler2D texture0; // diffuse texture keyword, DrawMesh uses this
uniform sampler2D texture_shadowmap; // custom uniform

out vec4 finalColor;

void main(){
    finalColor = fragColor * texture( texture0, fragTexCoord ); // get the colour that the fragment should be
    float shadowDepth = texture(texture_shadowmap, fragShadowTexCoord).r; // get the depth from the shadowmap at the transformed shadow position
    if(fragShadowDepth + 0.001 > shadowDepth){ // test fragShadowDepth against shadow sample
        // fragment is in shadow, do whatever you want to the colour
        finalColor = vec4(finalColor.rgb*.2,finalColor.a);
    }
}
The 0.001 offset is to prevent what’s called ‘shadow acne’, which happens as a combination of floating point imprecision and because the triangles being drawn may be oblique in the clip space of the light source, when the depth in the shadowmap cannot be. When a fragment is in shadow, you can blend colours however you like.
And that’s it. Rendering something with these shaders will depth test against the shadowmap, and you will have shadows. Hard shadows. Ugly shadows. But still shadows. In raylib.
There are also soft and volumetric shadow techniques which you should really go read Xor’s blog about (linked above) if you are interested in taking this further.
Ending.
That’s all I have time for tonight. it’s past 2am. Next one I might do a demo project, supply source, images etc. but at the same time I want to make videos, so I think writing this out will dust off my writing skills a bit so I can do that. I also need to make the game. I did this as a means of procrastination.
Thanks for reading though :)
xwitter noinodev for updates on Group Z and more raylib stuff
youtube noinodev for nonsense i may or may not make in the future
discord noino's video games for everything ive ever made and other exclusive stuff
and pls subscribe here id appreciate that


